|
|
|
Kto jest w sklepie?
Sklep przegląda 5803 gości |
|
Kategorie
|
|
Informacje
|
|
Polecamy
|
|
|
 |
|
|
Dla tego produktu nie napisano jeszcze recenzji!
 ;
Bardzo dobra jakość skanu, przystępna cena. Instrukcja serwisowa okazała się przydatna przy "reanimowaniu" dwudziestoparoletniego decka, który teraz pięknie gra :)
;
...instruction is ok.
...instrukcja jest ok.
Thanks/Dzięki
;
Documentation made available quickly and It is good quality. Thanks.
TEST MODE
1. CD Test Mode
1-1. How to Start Up the CD Test Mode
While pressing the �CD OPEN/CLOSE� button, connect the AC plug to the power outlet. When the CD test mode is started up, When the CD test mode starts up, all displays turn on. Note: When the PANEL, TOP has been removed for each CHAS, GEAR, be sure to short pin-4 and pin-5 of the connector CN3 on the CD board in order to recognize that the CD lid is closed.
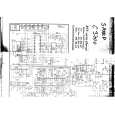
ELECTRICAL ADJUSTMENT
CD C.B
TP1 (RF) IC1 TP2 (VREF)
1
SFR130 CN2
1-2. Releasing the CD Test Mode
Remove the shorting between pin-4 and pin-5 of the connector CN3 on the CD board to return to the original setup. Then press the POWER button or the FUNCTION button, or remove the AC plug from the power outlet to release the CD test mode.
TP3 (TE)
R2
1-3. Function Description of the Test Mode
MODE Start mode Search mode Operation Starting up the test mode 9 CD Continuous focus searching. The pickup lens repeats the fullswing up-down motion * Note Play mode 2 Track No. and playing time are displayed Traverse mode Sled mode ; 6 5 Track No. and playing time flash CD TEST The pickup moves to the innermost track The pickup moves to the outermost track Note: If the focus search operation is continued for 10 minutes or longer, heating of the driver IC is accumulated to trigger the protection circuit that will stop operation of the CD system. .Turn off the main power and re-start operation about 10 minutes later. Sled servo. Check operation of the mechanism. TP1 (RF) TP2 (VREF) � + Normal playback. When the TOC reading is not possible, the same movement as in the search mode. Playback PAUSE mode Check APC circuit. Laser current measurement. Focus error waveform check. Focus servo. Tracking servo. CLV servo. Sled servo. Tracking servo OFF. 1. Focus Bias Adjustment Make the focus bias adjustment when replacing and repairing the optical block. Oscilloscope (DC range) TP3 (TE) TP2 (VREF) + � Indication on display CD TEST Function Contents
< CD SECTION >
Note: � Connect a probe (10: 1) of the oscilloscope test point for adjustment. � Connect ground (-) terminal of oscilloscope probe to TP3 (VREF) for all adjustment.
2. Tracking Balance Check Oscilloscope (DC range)
1) Connect an oscilloscope to test points TP3 (TE) and TP2 (VREF). 2) Start up the CD test mode. 3) Insert the test disc TCD-782 (YEDS-18) and enter the traverse mode of the CD test mode. 4) Confirm that the traverse waveform on an oscilloscope is vertically symmetrical as shown in the figure below. 5) After confirming the waveform, release the CD test mode.
1) Connect an oscilloscope to test points TP1 (RF) and TP2 (VREF). 2) Turn on the power switch. 3) Insert test disc TCD-782 (YEDS-18) and play back the second program. 4) Adjust SFR103 so that RF signal of the test point TP1 (RF) is MAX and CLEARREST.
A VREF B A=B VOLT/DIV: 20mV TIME/DIV: 1mS
MAX 1.8±0.1 Vp-p 0V EYE PATTERN must be CLEAR and MAX. VOLT/DIV: 0.5V TIME/DIV: 0.5µS
3. Laser Current Check The current of the laser signal can be checked with the voltages on both sides of R2 (voltage across 10 ). The difference for the specified value shown on the label must be within ± 6.0mA.
KSS-213F 15165 SG442
44.2mA
Laser current Iop =
Voltage across R2 10�
53
54
|
|
|
> |
|